
Mini Watercolor Book
I’m always trying to find new and different ways to stretch my watercolor legs. It has so much more potential than just paint on paper!! Here’s a little tutorial on how I made this cute book, so you can too! You can watch how I make it in the video below or scroll on to see the step by step photos!
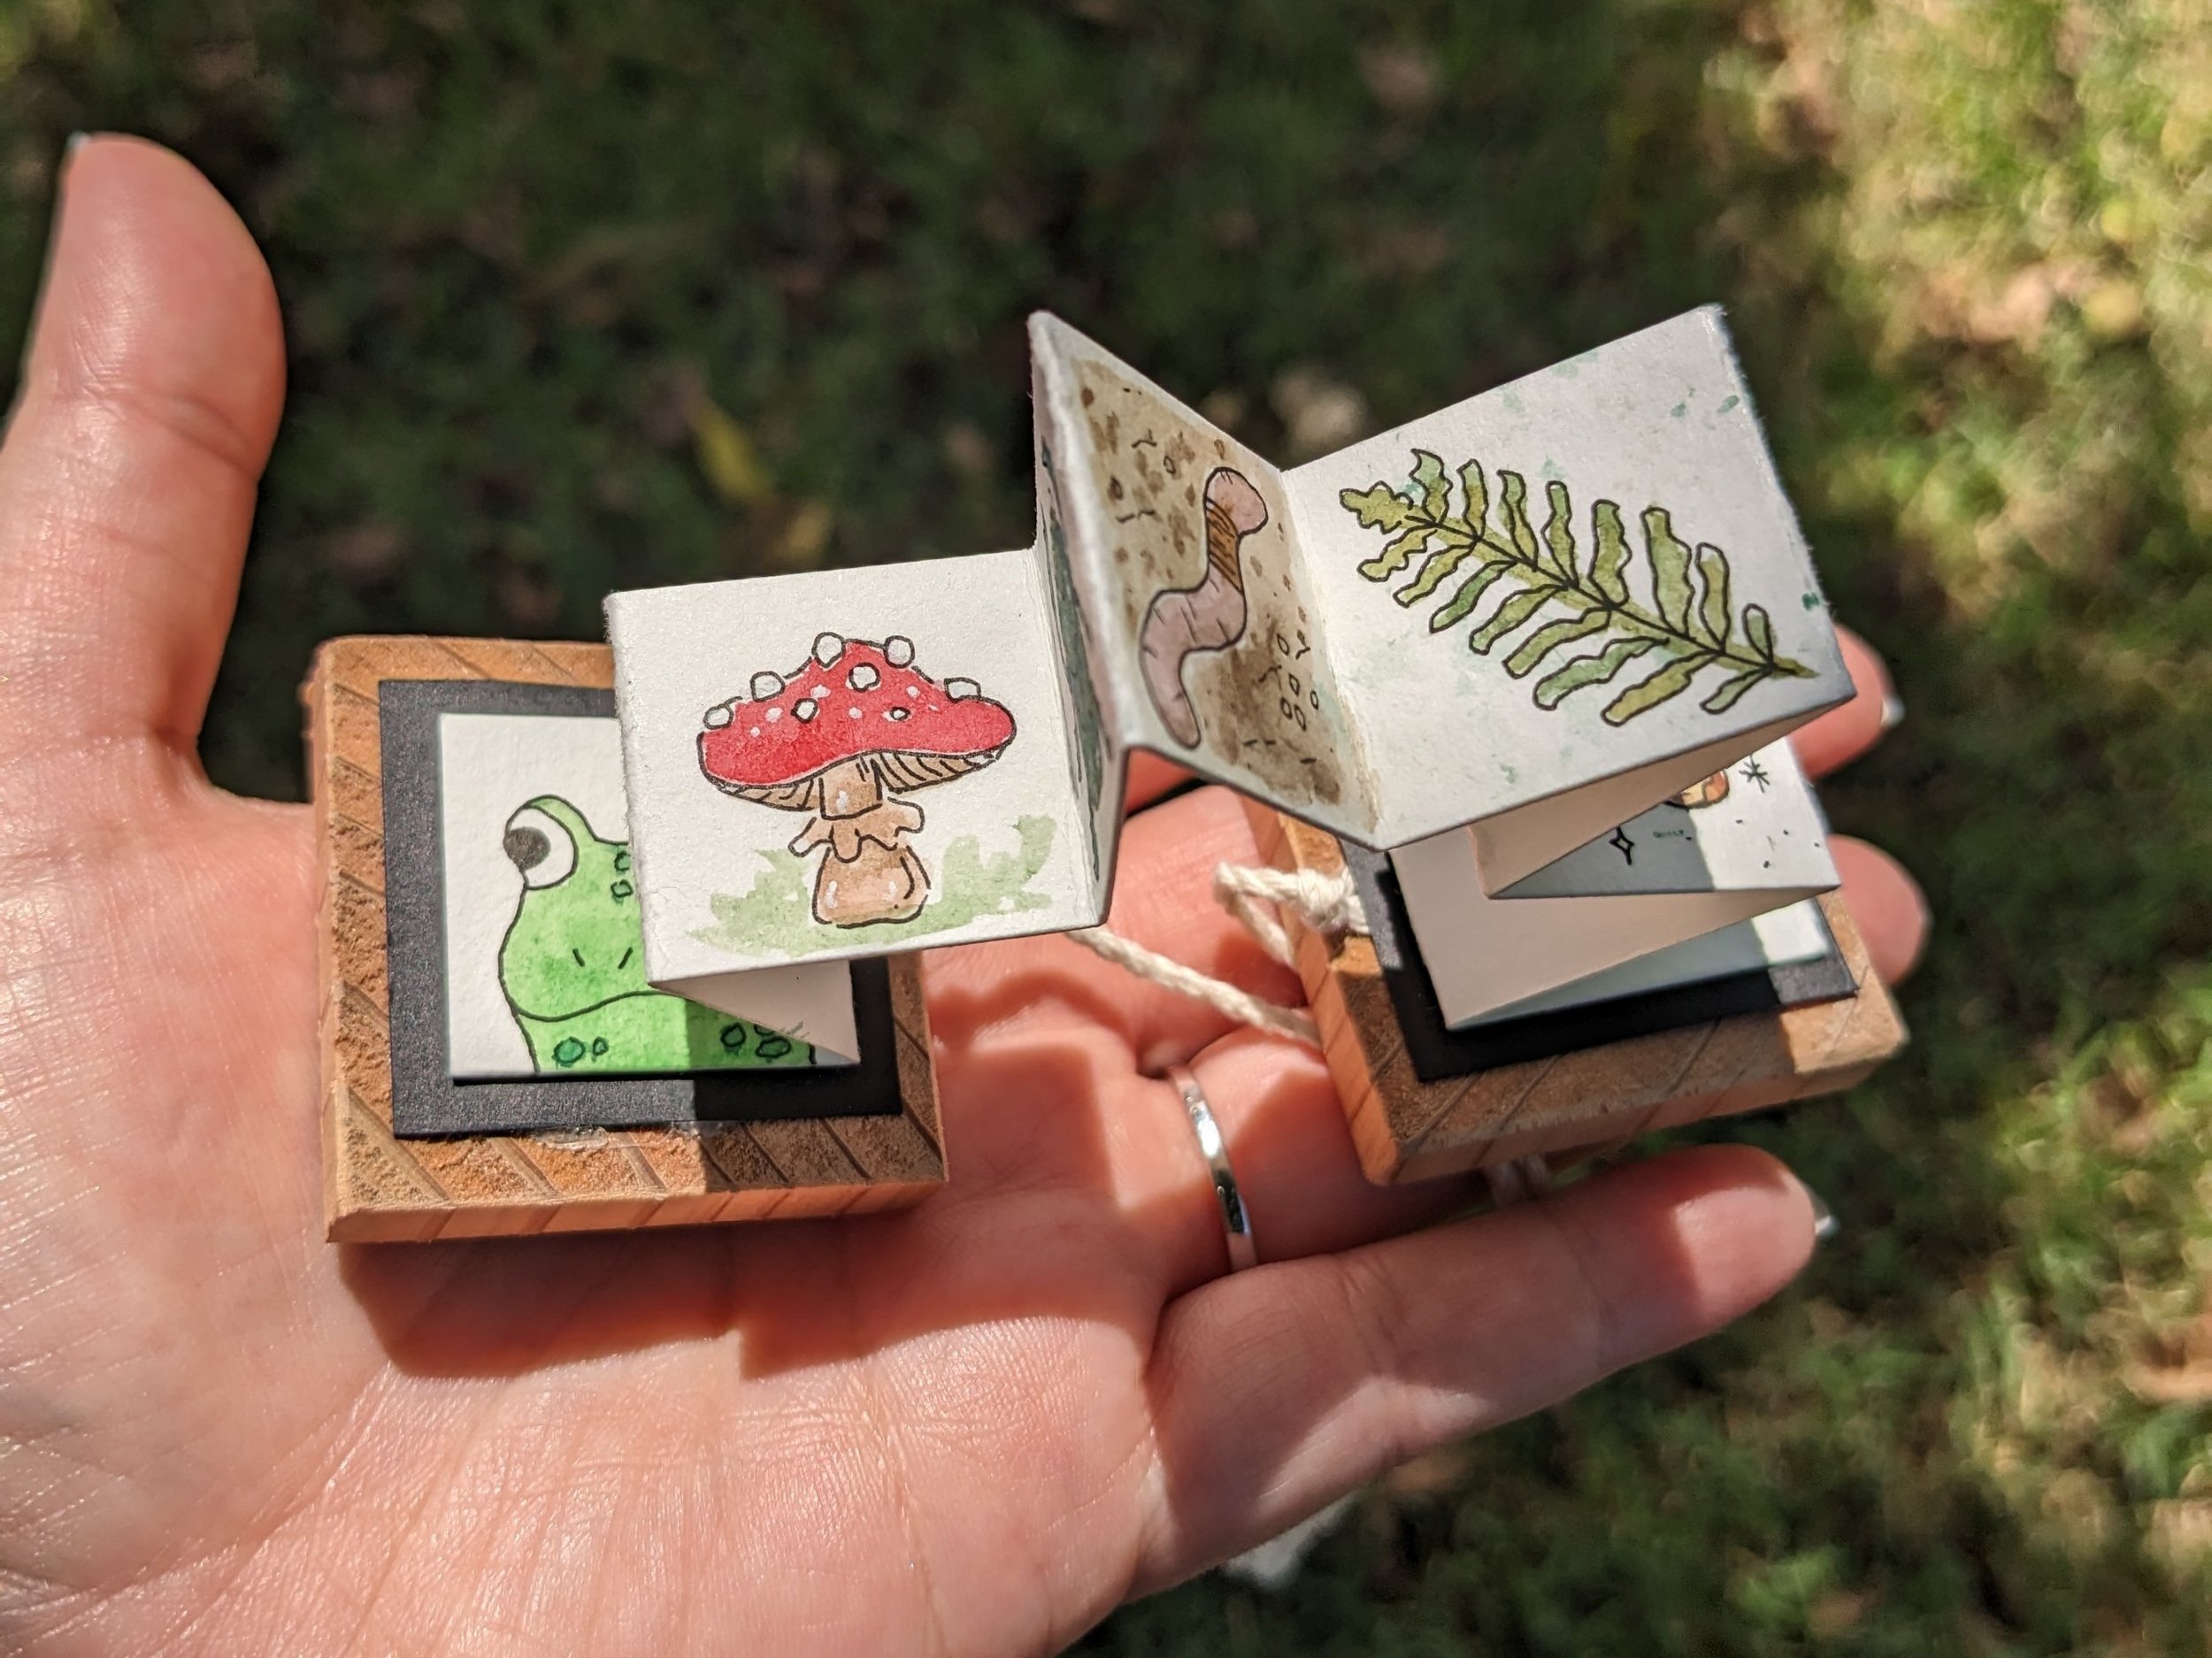
Mini Watercolor Book
This little project is so simple and has so much potential for making it uniquely your own! Don’t be afraid to make it with whatever material you have laying around, try different glues, use a different medium, whatever makes your heart happy!!
But here is how I made mine…

Supplies!
Two pieces of wood ( or other items as “book ends”)
Two 12 inch pieces of twine
I used a three strand type for strength (see next panel)
cardstock for the backing paper
Watercolor paper (mine is 140lb)
Mine is 1x 10 inches and dived into 1 inch pieces
pencils, pens, paints and whatever else you want to use for the art

Building the Book
First I frayed the ends of the twine so I could spread them out for better coverage and support.
Next, I did just a dab of hot glue to hold the strands down.
Once that dries I added more glue to the top, being careful not to put too much.
Then add the cardstock before the hot glue dries!
Now lay all of that aside until you have your art ready!

Securing the twine
Before we glue down our artwork, be sure to tie a knot at the end of the twine that is closest to the wood blocks. This will keep it from unraveling for any reason and give you that “bound” look!

Draw out you ideas!
Before you get to paint, of course you need to draw! I had fun thinking up different themes since I knew I was going to be making a few of these at the same time. You could even use this as a way to tell a 10 panel story or comic!
Ideas:
Favorite seasons/s
specific color palates
Celestial
Plants
tiny objects
….honestly the list is endless!
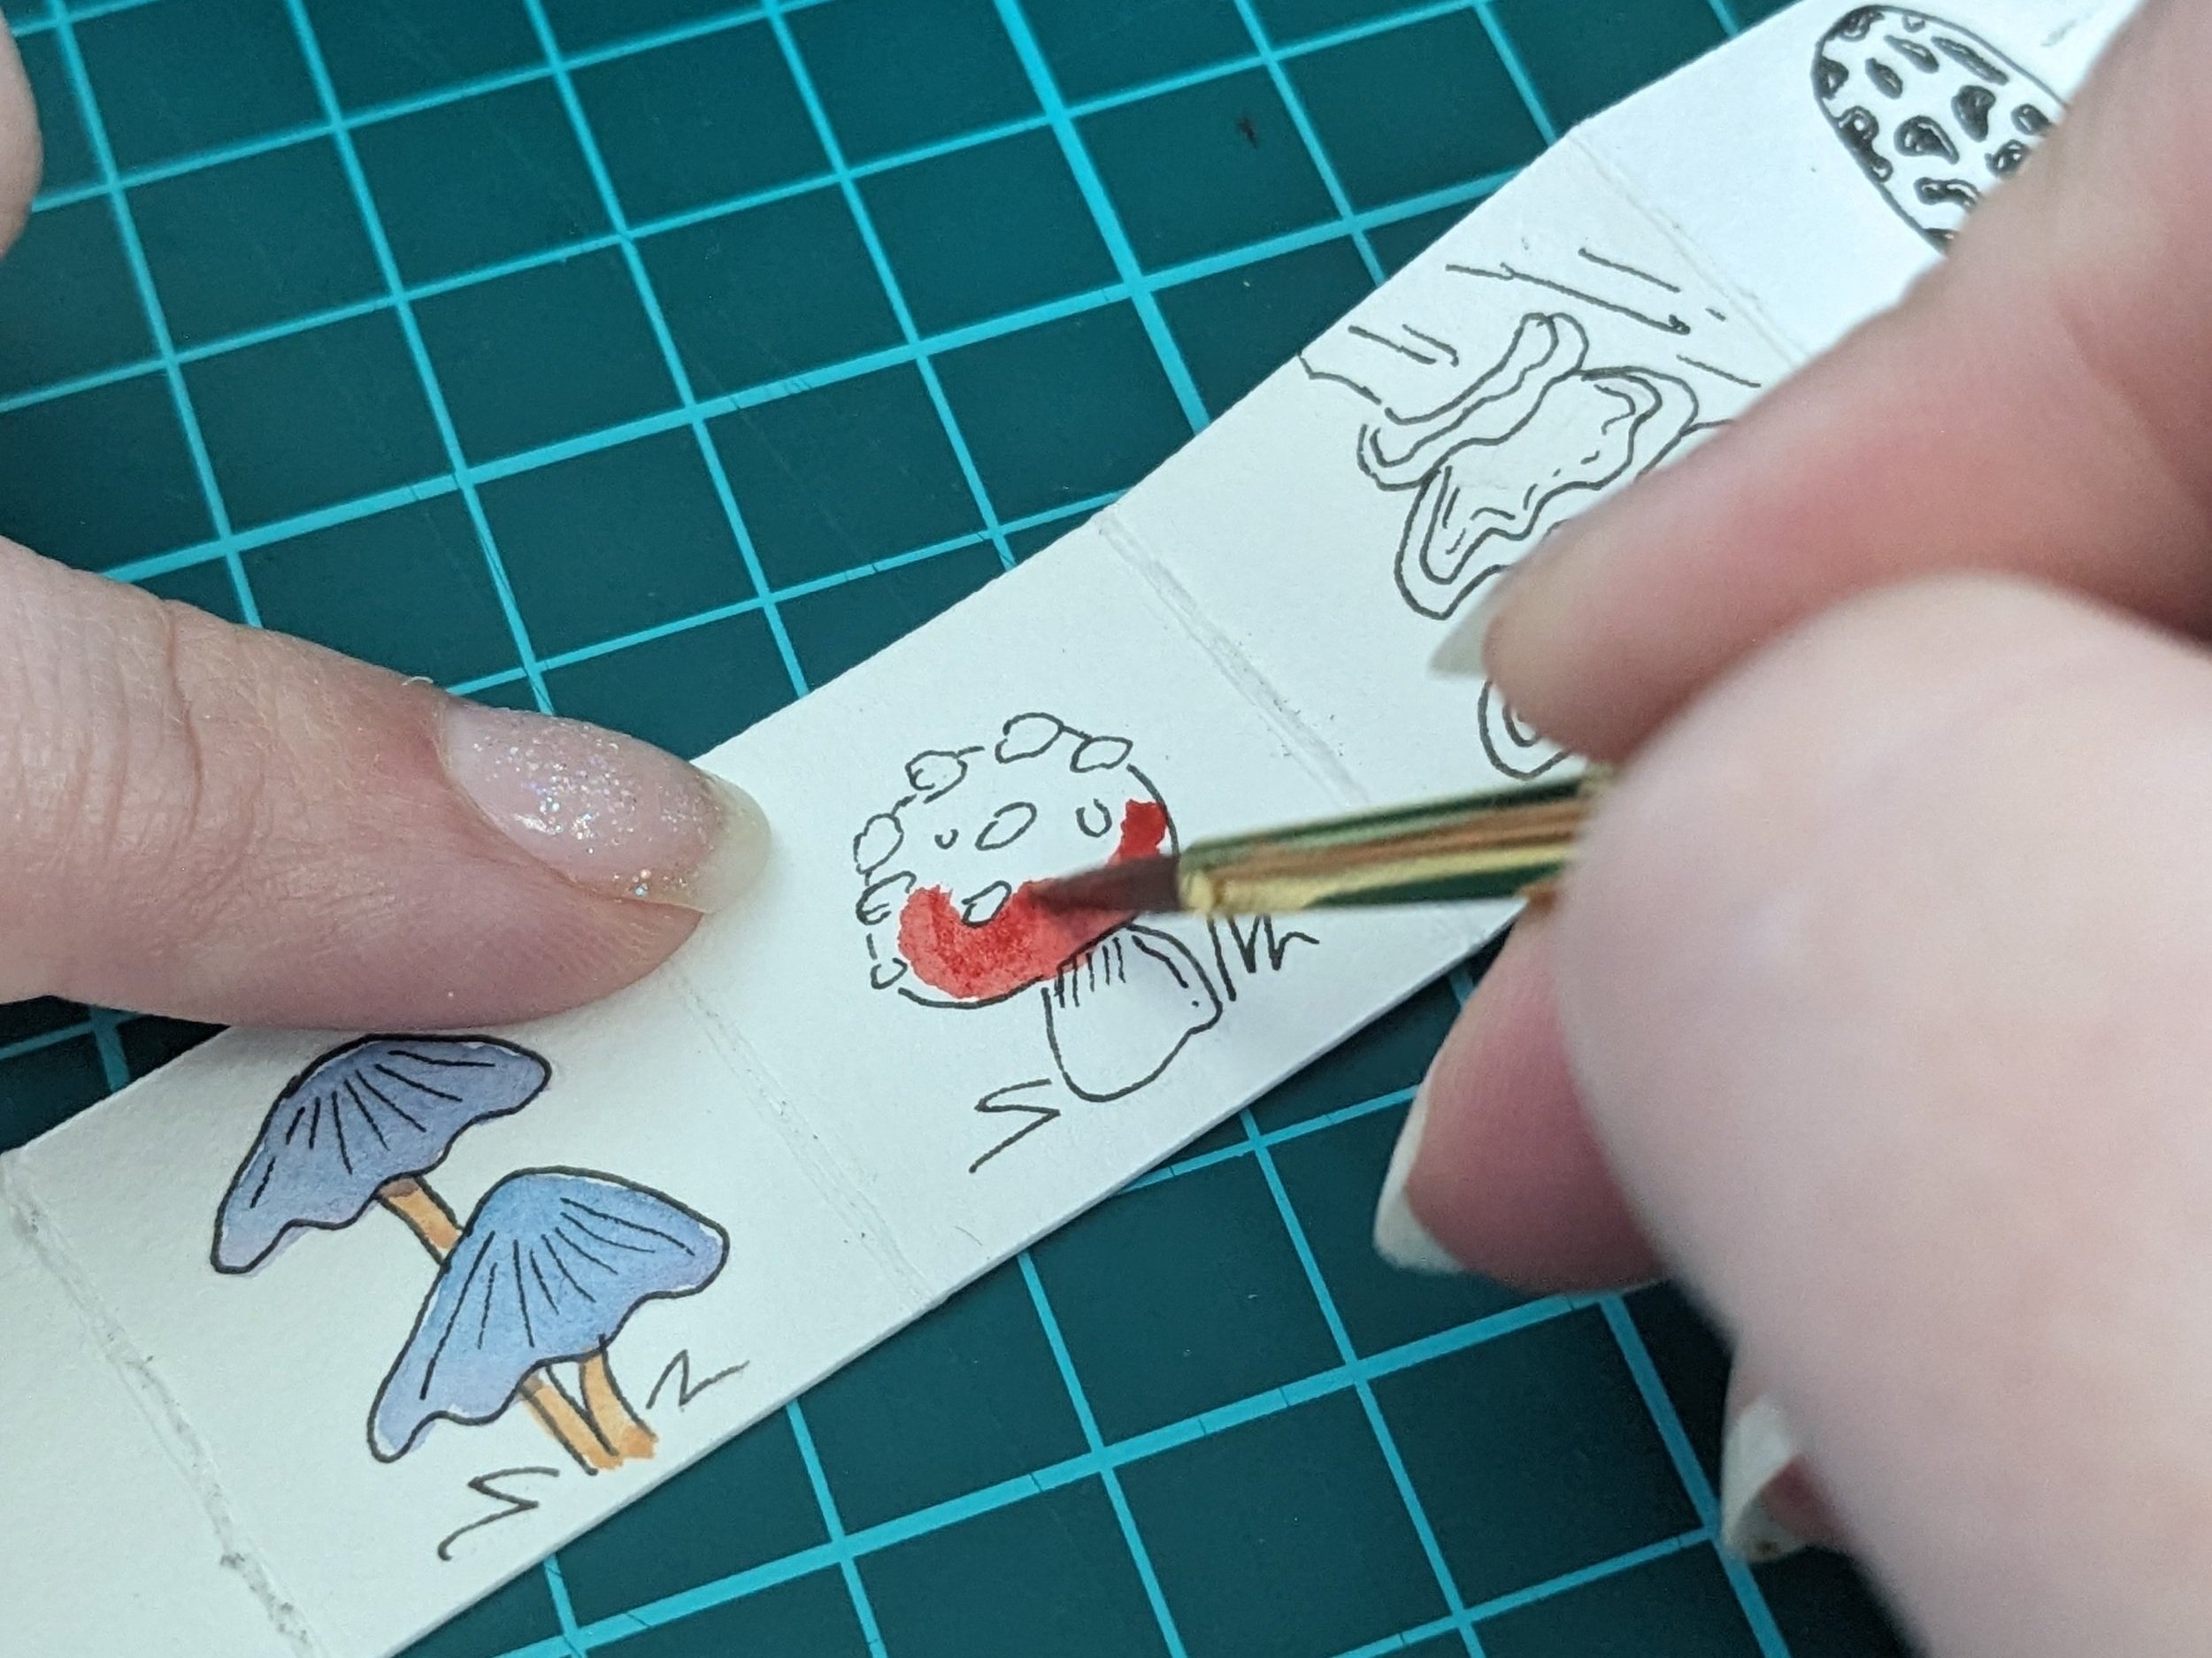
Paint!
Use any media you’d like, just be mindful of stressing out the paper too much because this will have to fold over and over again. So that means if you are doing this as the intended watercolor, don’t over saturate the paper, or let it dry really well before the next step!
I decided to paint the entire squares on some, but not on others and I saw no difference in the paper quality, it held up nicely!

Assemble!
Be sure to have the knots facing each other for this step!!
Take the right side of your strip and dab a manageable amount of hot glue it to the right wood panel
Then glue the left side to the left panel.
Now its attached!

Finishing Touches
When you close your book, take the twine and criss-cross them in the back (bottom piece over the top and top piece under the bottom) This will keep your book from opening at both ends.
Take the twin at the front and tie a bow!
I tied another not at each end of however long I wanted the twine to be and then trimmed off the extra. Now the ends wont fray!

Project Complete!
And there you have it! You’re very own book, all made by you and your art!
I can think of SO many variations for this project and hope to come back to it in the future. I’d love it if you could tag me on your socials if you make one too!
Don’t forget to watch the video for a more in depth tutorial!!!
Thank you for reading!